

Prepare for Sports Combines: A Practical Plan for Athletes
To improve your combine numbers, follow a focused 8 to 12 week plan that starts with baseline testing, drills into test-specific mechanics, and ends with a planned taper timed to peak on test day. That’s it. That’s the framework that separates athletes who post personal bests at a combine from athletes who show up and run their average.
Three actions matter more than everything else combined. First, record your baseline numbers on film before you change a single thing about your training. Second, pick your peak window now, 8, 10, or 12 weeks out, and build backward from your target test date. Third, put disproportionate attention on 40-yard mechanics and vertical jump technique, since small technical fixes there tend to produce the fastest, most visible gains.
If you’re also shopping for a structured program to guide this block, look for three things before you hand over money: a real mock combine near the end of the cycle, video analysis built into the coaching (not just a coach yelling cues), and staff with actual strength and conditioning credentials or collegiate/pro coaching history. We’ll walk through a full provider comparison later, but that’s the filter to run everything through.
- Film your current 40, vertical, broad jump, and shuttle this week, before doing anything else.
- Lock in an 8 to 12 week peak window based on how much testing experience you already have.
- Prioritize the first 10 yards of your 40 and your vertical jump takeoff mechanics over general conditioning.
- Screen any prep program for mock combine access, video review, and coach credentials before enrolling.
Key Takeaways
Measurable combine improvement comes from validated baseline testing, drill-specific mechanical correction over 8 to 12 weeks, and a real taper timed to peak on test day.
| Point | Details |
|---|---|
| Measure before you train | Film your 40, vertical, broad jump, and shuttle this week before changing your program. |
| Pick your peak window now | Choose 8, 10, or 12 weeks based on your prior testing experience, then build backward. |
| Fix mechanics, not fitness | Prioritize 40-yard drive phase and vertical jump technique over general conditioning. |
| Schedule a mock combine | Run one in weeks 9 or 10 under real conditions with full film review. |
| Vet any program carefully | Check for verified testing, coach credentials, and sample reports; TeamJHall supports the habits and gear side of this process alongside your training plan. |
Table of Contents
- Essential Checklist to Prepare for Sports Combines This Week
- What Does an 8 to 12 Week Combine Peaking Plan Look Like?
- Technical Cues and Common Errors for Each Combine Test
- How Are Combines Run, and What Do Scouts Actually Evaluate?
- Nutrition, Hydration, and Recovery During Your Prep Window
- How Do You Measure Progress and Set Realistic Targets?
- How Do You Run a Mock Combine and Prepare for Test Day?
- Finding and Comparing Combine Prep Programs
- Questions to Ask and Red Flags When Choosing a Program
- Research-Backed Insights and the Biggest Mistake Athletes Make
- Injury Prevention Strategies for Intensive Combine Training
- Mental Preparation Beyond the Warm-Up Routine
- TeamJHall’s Perspective on What Actually Separates Athletes at a Combine
- How TeamJHall Gear Supports Your Combine Prep Block
- Sources
- FAQ
Essential Checklist to Prepare for Sports Combines This Week
You don’t need a gym overhaul to start. You need seven days of disciplined information gathering before you touch your training plan.
Here’s what to knock out before next week starts:
- Record a timed 40-yard dash, using a laser system if you have access to one, and film it from the side.
- Test your vertical jump and broad jump, and film both from a rear angle to check hip and knee symmetry.
- Run a 5-10-5 shuttle and log the time alongside your jump numbers.
- Max out (or estimate) your bench press 225-pound rep count if your sport tests it.
- Register for your target combine, pro day, or showcase event now, since spots and dates fill fast heading into peak season.
- Confirm exactly how that event times its 40, hand-timed or laser, so you can train against the same standard.
Pro Tip: Hand timing routinely reads faster than laser timing by a few tenths of a second, because human reaction lag varies at the trigger and at the finish. If you train against hand times all winter and then get laser-timed at the actual event, you’ll walk away disappointed by a number that doesn’t reflect your real progress. Ask the event upfront which system they use, and mirror it in every training test you run.
Logistics matter here too. Travel, hotel bookings, and confirming the exact testing format all need to happen in week one, not week seven, when you’re deep into training and don’t want the distraction.
What Does an 8 to 12 Week Combine Peaking Plan Look Like?
Eight to twelve weeks is the window most coaching literature converges on for combine-specific preparation, and the range exists because athletes start from different places. An athlete with prior testing experience and clean mechanics can peak in 8 weeks. An athlete who has never been timed in a structured setting, or who’s carrying mechanical flaws nobody has caught yet, needs the full 10 to 12 weeks because the first two weeks get eaten up by correction work before any real development can begin, according to a coach’s 8-week combine system.
Combine prep isn’t general conditioning stretched over a few months. It’s a compressed, specialized peak block that shifts almost entirely toward technical expression and tapering as the date approaches, according to Sportian Network’s breakdown of combine training. That distinction matters when you’re choosing between an 8-week sprint and a fuller 12-week build.
Here’s a sample 10-week structure you can adapt:
- Weeks 1 to 2, assessment and correction. Baseline testing, film review, and fixing the two or three mechanical flaws that are costing you the most time or height. No max-effort testing yet.
- Weeks 3 to 5, drill development. Segmented sprint work, isolated shuttle footwork, jump mechanics broken into phases (load, drive, land). Volume is moderate, intensity climbs steadily.
- Weeks 6 to 8, integration and simulated testing. Full-speed reps of each tested movement, combined into mock testing sessions once a week. Volume starts dropping even as intensity holds.
- Weeks 9 to 10, taper and peak. Sharp volume cuts, high-intent short efforts, full recovery days built in, culminating in your test date or a final mock combine 5 to 7 days out.
A typical microcycle during weeks 3 through 5 runs 5 to 6 training days, splitting field-based drill work from weight-room strength and power sessions, which mirrors how specialized off-season combine training gets structured for football athletes according to FootballPlayCard’s specialty training guide.
Pro Tip: In weeks 6 through 8, cut total rep volume by roughly a third but don’t touch intensity. Fewer reps at full speed beat more reps at 85 percent every time this close to test day, because your nervous system needs to relearn what maximal output feels like without the accumulated fatigue burying it.
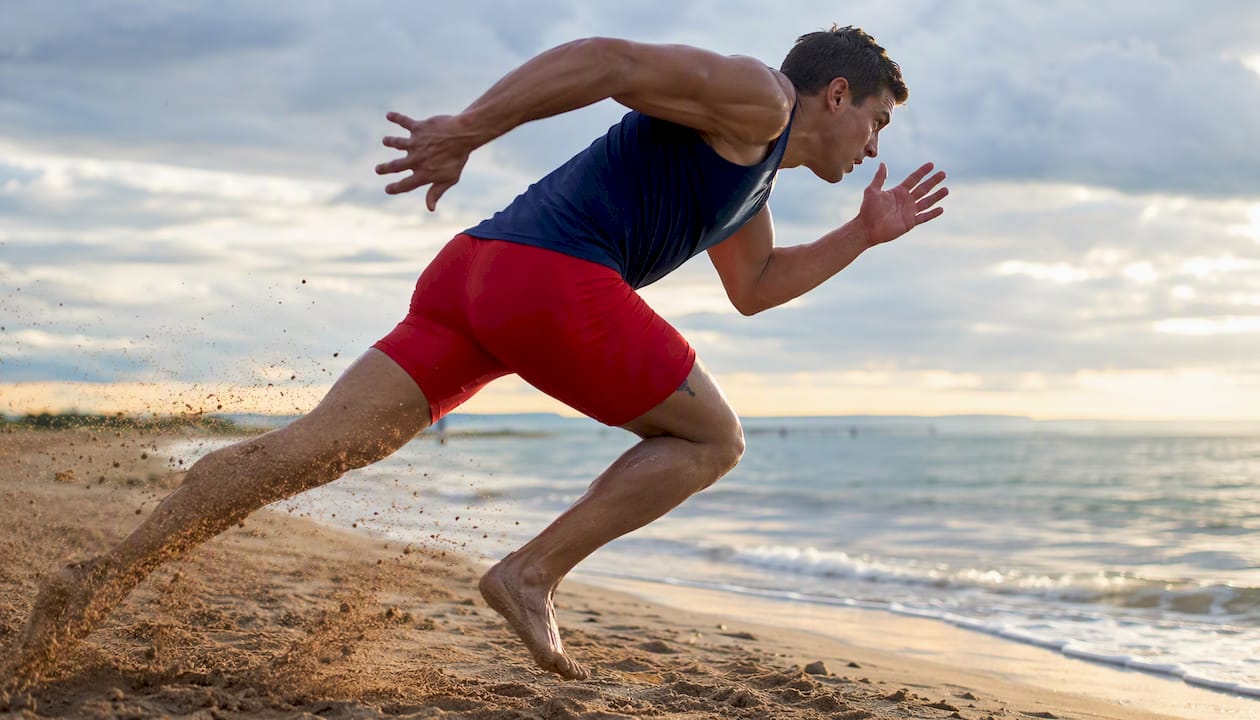
Your training block should feel different by week 8 than it did in week 3. If it doesn’t, you’re probably not tapering aggressively enough. Reviewing how sport-specific conditioning differs from general fitness work helps clarify why this shift matters so much in the final third of your plan.
Technical Cues and Common Errors for Each Combine Test
Every combine test rewards a specific, learnable movement pattern. Chasing raw fitness without fixing mechanics is the slowest way to improve your numbers.
40-yard dash. The first 10 yards, your drive phase, determines most of your final time more than anything that happens after yard 20. Isolating your stance angle and that initial drive produces bigger, faster gains than chasing top-end speed in a short prep window, based on first-step speed drill research.
- Cue: keep your front shin at roughly a 45-degree angle in your stance so your first step pushes forward, not up.
- Common error: popping the head up too early, which kills forward lean and stands you up before yard 5.
- Drill: wall drive marches and resisted sled starts, 4 to 6 sets of 10 yards, twice-weekly during weeks 3 to 8.
5-10-5 pro shuttle. This test punishes poor hip turns and weak deceleration far more than it rewards straight-line speed.
- Cue: plant the outside foot and pivot the hips before the shoulders turn.
- Common error: overrunning the line, which adds a false step before the direction change.
- Drill: segmented 5-yard sprint-to-plant reps, building to full 5-10-5 reps by week 6.
Three-cone (L-cone). Bend and lean angles decide this test more than raw speed does.
- Cue: lower your center of gravity through both turns instead of running upright.
- Common error: taking a wide, looping path around the second cone, which adds distance and time.
- Drill: isolated single-cone turn reps before stringing the full pattern together.
Vertical jump. Depth and arm swing timing matter more than raw leg strength for most athletes below elite levels.
- Cue: load your hips back and down like sitting into a chair, then explode straight up with arms driving overhead.
- Common error: too shallow a countermovement dip, which cuts the stretch-reflex benefit your muscles need.
- Drill: depth drop progressions building into countermovement jumps, 3 sets of 5, twice weekly.
Broad jump. Land mechanics separate good broad jumps from great ones just as much as takeoff power does.
- Cue: drive both arms forward and up at takeoff, and stick the landing without falling backward.
- Common error: landing and immediately stepping back, which signals a lack of control and can affect measurement.
Bench press (225 lb reps). This test is about pacing and grip endurance, not one-rep max strength.
- Cue: establish a consistent, controlled tempo, roughly a two-count down and explosive up, from rep one.
- Common error: burning out on speed in the first five reps, then grinding out ugly, slow reps that cost overall count.
- Drill: tempo bench sets at submaximal loads, focusing on rep consistency over total weight, weeks 3 through 7.
How Are Combines Run, and What Do Scouts Actually Evaluate?
A standard combine follows a fixed order: measurements first, then position drills, then timed testing, with a defined warm-up window and usually two to three attempts per test recorded for the official number. The NFL Combine is the most visible version of this format, a standardized, publicly tracked evaluation where repeatable movement and verified numbers matter as much as raw talent.
Timing method changes everything about how your numbers translate. Hand timing and laser timing don’t measure the same thing the same way, and the gap between them can be the difference between a number that impresses and one that doesn’t. Train against whatever system your target event actually uses.
Scouts and evaluators look well past the stopwatch:
- Repeatability. Can you produce close to the same number on attempt two and three, or was attempt one a fluke?
- Position-specific movement. Does your shuttle time translate to how you actually move in game footage, or is it an isolated skill with no carry over?
- Film comparison. Evaluators often pull your combine footage next to game film to check whether your tested athleticism shows up when it matters.
- Interview and mental evaluation. Composure under a room full of strangers timing your every move is its own tested skill at higher levels.
Pro Tip: Build a pre-test routine, the exact same warm-up sequence, cues, and mental checklist, and run it identically at every practice test throughout your prep block. By test day, your body should recognize the routine as a signal to perform, which cuts down the chance nerves override your training.
Nutrition, Hydration, and Recovery During Your Prep Window
Your training plan only works if your body can absorb it, and that means treating nutrition and sleep as scheduled parts of your program, not afterthoughts.
Protein intake needs to stay high and consistent throughout an 8 to 12 week block to preserve lean mass while you’re asking your body to handle repeated high-intensity sessions. Carbohydrate timing matters just as much: front-loading carbs before double-session days and refueling promptly afterward keeps your output from degrading session over session. Athletes managing weight for positional reasons, adding mass or leaning out, need to plan this carefully rather than winging it, and guidance on managing weight for performance is worth reading before you start cutting or bulking mid-block.
Hydration deserves more attention than most athletes give it. Even mild dehydration measurably slows contraction speed and reaction time during sprint testing, according to research on hydration and athletic performance. That’s not a minor edge, it’s the difference between a sharp first step and a sluggish one. Build hydration habits during training weeks, not the morning of your test, since your body doesn’t rehydrate on command in a few hours.
Daily recovery routines matter as much as the training sessions themselves:
- Target 8 or more hours of sleep nightly during your heaviest training weeks; this is when adaptation actually happens.
- Build in active recovery days, light movement and mobility work, rather than total rest, which can leave you stiffer.
- Track soft tissue work weekly, foam rolling, stretching, or professional bodywork if it’s available to you.
- Monitor session RPE (your own perceived effort rating after each session) to catch quiet fatigue before it turns into a plateau or injury.
Pro Tip: Track body composition every two weeks with a simple method, calipers, a smart scale, or a scan if you have access, rather than daily weigh-ins that swing with water retention and tell you nothing useful. If you’re not seeing the composition shift you expect by the midpoint of your block, that’s your signal to adjust calories, not to panic and overhaul everything.
For deeper detail on structuring meals and timing around training, eating for athletic performance covers the specifics worth building into your weekly plan.
How Do You Measure Progress and Set Realistic Targets?
Every number you chase during this block needs a baseline to measure against, and that baseline needs to be filmed, not just timed.
Record these numbers in week one and again at your midpoint check:
- 40-yard dash, with 10-yard and 20-yard splits if your timing system supports it.
- Vertical jump and broad jump, filmed from the side and from behind.
- 5-10-5 shuttle time.
- Bench press 225-pound rep count, if tested in your sport.
- Body composition, using whatever consistent method you have access to.
Film every baseline test from two angles, side and rear, so a coach or you’re reviewing footage later can spot asymmetries or mechanical faults that a stopwatch alone will never reveal. A basic timing app with split capability, a jump mat, or even a Vertec-style measuring device, and a body composition scanner if your gym has one, cover most of what you need without expensive equipment. Keep everything in one simple spreadsheet or log, date, test, number, and a link to the film clip.
Realistic gains over an 8 to 12 week block vary by how far you started from a refined technique. Athletes with no prior testing experience and clear mechanical flaws tend to see the largest raw jumps, since correcting a flawed stance or a shallow jump dip produces outsized returns fast. Athletes who already move well see smaller, harder-won gains, often just a tenth of a second or an inch or two, because they’re refining rather than fixing. Calibrate your expectations against your own starting point, not against a teammate’s number or a highlight reel.
| Baseline metric | How to record it | What to track over time |
|---|---|---|
| 40-yard dash | Laser or app-based timing, side-angle film | Full time plus 10-yard split |
| Vertical jump | Jump mat or Vertec-style device, rear-angle film | Height and takeoff symmetry |
| Broad jump | Tape measure from takeoff line, side-angle film | Distance and landing control |
| 5-10-5 shuttle | Stopwatch or timing gates | Total time and turn quality on film |
| Bench 225 | Rep count with spotter | Total reps and pacing consistency |
How Do You Run a Mock Combine and Prepare for Test Day?
A mock combine only works if it replicates the real conditions closely enough to expose the same weaknesses that will show up on the actual day.
Here’s how to structure one:
- Schedule it for weeks 9 or 10 of your plan, with a full week of recovery beforehand so you’re not testing on tired legs.
- Run tests in the same order your target combine uses, and rest between them the way that event structures its schedule.
- Film every attempt and record every number the way you would in a training log, no exceptions, no throwaway reps.
- Debrief immediately afterward, comparing numbers against your baseline and flagging anything that regressed.
Your actual test-day sequence should feel like a session you’ve run a dozen times before, because by then, it should be.
- Arrive with enough buffer to avoid rushing, ideally 60 to 90 minutes before your scheduled time.
- Run your standard activation sequence, dynamic stretching and movement prep, exactly as you’ve practiced it in training.
- Move through your specific warm-up progression for each tested movement, gradually building intensity.
- Take your mental routine, whatever cues or visualization you’ve built, through the same steps every time.
- Limit practice reps to what you’ve used in training; more isn’t better here, it just adds fatigue before the reps that count.
Pro Tip: Practice your full warm-up checklist at least three times identically before any real event, including travel logistics if you’re going somewhere new. Athletes who fly or drive several hours to an event and skip acclimation time often underperform their training numbers simply from travel fatigue nobody accounted for.
Finding and Comparing Combine Prep Programs
Once your own plan is running, the question becomes whether to build it solo or lean on a structured program. Several options serve different needs, and picking the wrong one wastes both time and money.
| Program | Level served | Length & intensity | Key features | Location/availability | Outcome evidence |
|---|---|---|---|---|---|
| TeamJHall combine support | All levels | Ongoing content, fits any 8-12 week block | Combine-prep content resources, performance apparel for training and travel | National, online | Publisher-supported content, not a testing service |
| National Scouting Combine | High school through college | Single-day to multi-day events | Standardized testing, verified results, scout exposure | National event circuit | Verified testing data shared with scouts, per National Scouting Combine |
| PPI Academy Combine Prep | High school and college | Multi-week camp sessions | Segment-focused training, built-in mock combine | Regional/camp-based | Mock combine simulates real test-day structure |
| Edge Sports Fitness | High school through pro | Ongoing S&C programming | Coach-led strength and conditioning, local testing verification | Regional/local | Coach-led verification, local track record |
| PPI Academy (Combine Prep program) | High school and college | Multi-week, segment-based | Scripted curriculum, mock combine | Regional/camp-based | Mock combine outcome tracking |
TeamJHall doesn’t run testing events. What it offers is a home base of combine-prep content and performance apparel designed to support the daily habits, training consistency, and travel logistics that make an 8 to 12 week block survivable, alongside a direct line to gear built for the actual work.
National Scouting Combine leans hardest on standardized, verified testing and national-level exposure, which matters most if getting your numbers in front of scouts is the priority over technical coaching.
PPI Academy’s Combine Prep program runs camp-style, segment-focused sessions that build toward a scripted mock combine, a good fit for athletes who want hands-on, structured coaching rather than a self-guided plan.
Edge Sports Fitness fills the regional, coach-led niche, strength and conditioning support with local testing verification for athletes who want in-person coaching without traveling to a national event.
Before trusting any provider with your prep block, check for real credibility signals: verified testing methodology (not just a stopwatch and a claim), staff with actual strength and conditioning certifications or collegiate/pro coaching backgrounds, and sample athlete reports or documented placements you can actually review, not just testimonials.
Questions to Ask and Red Flags When Choosing a Program
Before signing up or paying for any combine prep program, run it through a short set of questions.
- How exactly do you verify test times, laser, hand-timed, or a documented hybrid, and can I see a sample report?
- What are the staff’s actual credentials, certifications, and prior coaching experience at the collegiate or pro level?
- Does the program include a real mock combine, and how closely does it mirror actual event conditions?
- Can I see a sample athlete report or a documented placement outcome from a past participant?
- What’s the refund or trial policy if the program isn’t a fit after the first week or two?
Watch for these red flags, which tend to predict a wasted training block:
- Hand-timed-only verification with no laser option and no acknowledgment of the discrepancy between the two.
- No filmed report or data log provided to you as part of the program.
- Coaches without any strength and conditioning certification or documented position-specific coaching background.
- Pressure to sign a long-term contract before any evaluation of your current baseline.
Budget realistically against documented outcomes, not against the flashiest marketing. A cheaper program with a real mock combine and transparent testing beats an expensive one built on testimonials alone. Reviewing the different types of sports training programs available helps set expectations for what a reasonable price range actually buys.
Research-Backed Insights and the Biggest Mistake Athletes Make
The evidence behind the 8 to 12 week window isn’t a marketing number. Multiple coaching sources converge on it because the timeline reflects a real physiological sequence, correction, development, and taper, that shorter windows simply can’t complete. Athletes with no prior testing experience specifically need the longer end of that range, 10 to 12 weeks, since the first phase of any real program has to be spent fixing mechanical flaws before physical development even starts, according to Simplifaster’s research on combine athlete performance.
Three research-backed coaching points show up again and again across credible sources:
- Measure early. Establish a validated, filmed baseline before changing anything about your training.
- Isolate mechanics. Fix the one or two biggest technical flaws before chasing broader physical gains.
- Taper volume late. Cut reps aggressively in the final two to three weeks while holding intensity high.
The single biggest, most avoidable mistake coaches flag is skipping that first step entirely. Athletes jump straight into hard training without a validated baseline, then have no way to know which specific flaw is actually costing them time or inches. Film early. It’s the cheapest fix in this entire plan and the one most athletes skip.
Pro Tip: Rate every training session on a simple 1 to 10 perceived effort scale and log it. If your RPE creeps upward while your actual output (speed, jump height, rep count) starts flattening or dropping, that’s quiet fatigue building, and it’s the warning sign that precedes both plateaus and injuries. Catching it two weeks early instead of two days before your test is what a taper is actually for.
Injury Prevention Strategies for Intensive Combine Training
An 8 to 12 week block asks your body to handle more high-intensity, high-velocity work than most off-seasons do, and that volume spike is exactly where injuries tend to show up if you don’t manage it deliberately.
Ramp intensity gradually rather than jumping straight into max-effort sprints or jumps in week one. Most soft tissue injuries during combine prep happen when an athlete tries to test-run a movement at full speed before the tissue has adapted to the new demand. The correction phase in weeks 1 and 2 exists partly for this reason, not just to fix mechanics, but to prepare tendons and connective tissue for what’s coming.
Build a consistent mobility and soft tissue routine into every week, not just the days you feel tight. Hip flexors, hamstrings, and ankles take the brunt of sprint and jump-heavy programming, and neglecting them is a common path to strains that derail a training block right when it matters most.

Respect the taper. Athletes who ignore volume reduction in weeks 6 through 8, thinking more reps always means more improvement, are the ones most likely to show up to test day carrying a nagging strain instead of a peak performance. If any single session leaves you limping or noticeably favoring a side, stop that session and reassess before continuing, regardless of how close you are to your test date. A missed session beats a torn hamstring every time.
Mental Preparation Beyond the Warm-Up Routine
A physical warm-up gets your body ready. It doesn’t automatically get your head ready, and combine day pressure is unlike anything most athletes have faced in a normal practice setting.
Visualization works best when it’s specific, not vague. Rehearsing “doing well” doesn’t help much. Mentally walking through your exact stance, your first step, and your finish line, in that order, repeatedly in the weeks leading up to test day, builds a mental script your body can lean on when nerves spike.
Control what you can control on the day itself. You can’t control who else is testing, how loud the room is, or whether a scout is watching your specific rep. You can control your breathing, your pre-rep routine, and your focus in the thirty seconds before your attempt. Athletes who anchor their attention to that small, controllable window tend to perform closer to their trained numbers than athletes who get pulled into comparing themselves to everyone else on the field that day.
Treat the interview and evaluation portion, where one exists, as its own tested skill worth practicing, not an afterthought squeezed in after the physical testing. Composure under direct questioning from strangers is exactly the kind of pressure combine day introduces, and it rewards the athletes who’ve rehearsed staying calm and direct under it just as much as it rewards a fast 40 time.
TeamJHall’s Perspective on What Actually Separates Athletes at a Combine
Most of the conversation around combine prep focuses on the drills, and rightly so. But watching how athletes actually improve over an 8 to 12 week block, the thing that separates a good outcome from a great one usually isn’t the workout itself. It’s whether the athlete shows up consistently, films honestly, and treats the small daily habits, sleep, hydration, recovery work, as seriously as the sprint sessions.
Coachability shows up in the numbers before it shows up in an interview. An athlete who takes a coaching cue in week 2 and actually changes their stance angle by week 4 is the same athlete scouts describe as coachable later, because the pattern doesn’t change just because the audience does.
At TeamJHall, the goal has never been to run testing events or coach mechanics directly. It’s to support the identity and consistency side of this process, the daily habits, the mental framework, and yes, the gear that makes an 8 to 12 week grind more comfortable to sustain. Training hard for three months only works if you can actually show up every day feeling ready, and that’s a bigger lever than most athletes give it credit for.
How TeamJHall Gear Supports Your Combine Prep Block
An 8 to 12 week training block puts real demands on your gear, not just your body. Double-session days mean sweat management matters. Travel to mock combines and testing events means comfort matters over long hours in a car or on a flight. Confidence in how you look and feel on test day is a small edge, but it’s a real one.

Teamjhall builds performance apparel around exactly this window, fabrics designed to move with you through drill work and manage moisture across long training days, cuts that don’t restrict hip or shoulder mobility during sprint and jump mechanics, and travel-ready pieces that hold up whether you’re headed to a local mock combine or a national event. This isn’t a training program or a testing service. It’s the gear layer underneath everything else in this plan, built for athletes who are already doing the hard part and just need equipment that keeps up.
Check out the TeamJHall performance shirt built for exactly this kind of training block, or browse the full Teamjhall store to put together your training and travel kit before week one of your plan starts.
Sources
- Football combine preparation: proven 8‑week system (Signal XO)
- NFL Combine Training 8 to 12 Weeks (Sportian Network)
- PMC article on hydration and performance (PubMed Central)
- Nfl
FAQ
How long should I train before a combine in 2026? Most athletes need at least 8 weeks, and those without prior testing experience should plan for 10 to 12 weeks to allow time for mechanical correction before physical development begins.
What’s the single most important test to prioritize? The 40-yard dash carries the most weight for most positions, and your first 10 yards, your drive phase, determines most of your final time.
Should I train against hand time or laser time? Train against whatever system your target event actually uses. The two methods produce meaningfully different numbers, and training against the wrong one sets false expectations.
Do I need a formal program, or can I train on my own? Either can work if you’re disciplined about baseline testing, filming, and tapering correctly. A structured program helps most if you lack access to a mock combine or objective technical feedback.
How do I know if a combine prep program is legitimate? Ask for their testing verification method, staff credentials, and a sample athlete report before enrolling. Programs that resist these questions are a red flag.